Six on Saturday – The Rainforest Garden

I started this garden several years ago, the idea was to recreate a rainforest using mostly colors and textures in shades of plum and green with a few pops of color. My Living Room looks into this space so the plants are placed around the windows to shape views from the inside and outside. Here is what I started with:

Screenshot 2020-07-01 at 2.05.26 PM

I referred to this ‘landscape’ as the beach with weeds. The glob of plant material on the right side had to be removed with a bobcat – I poked around at it with loppers for a while then gave up and had everything scraped out. The existing irrigation was capped off and I installed above ground tubing and microspray heads to keep the water off the walkway and be very efficient. The sand holds very little water and is mostly unamended – plant material was chosen carefully to cope with the conditions.

walkway construction

I planted the areas around the walk, and then hired a contractor to install plastic edging. I installed the fabric, then leveled the sand, added stepping stones and shell gradually. I have a crushed shell driveway and had a pile of leftover shell. This is 2018.

rainforest garden

Later in 2018 with the walkway completed. I am not sure how long all that took, though I remember it was many tiny wheelbarrows of shell…

Here it is today, I am standing under an Avocado tree planted about 4 years ago.

img_20200702_133314img_20200702_133319

One of the plum and green Bromeliad beds:

img_20200702_093625

Looking back, I am amazed at how quickly the garden has grown in and enjoy sitting in the garden with a glass of wine frequently.

For more Six on Saturday posts visit http://www.thepropagatorblog.wordpress.com…

Happy Gardening.

In a Vase on Monday – Bromeliad Cachepot

img_20200126_113117

I decided to do something different this week. This is a pot of Bromeliad cuttings from my garden. The cuttings are in a 1 gallon nursery container double potted inside the cachepot. These Bromeliads are so bulletproof they are planted in old dried out potting soil and sand, a very well drained mix that will serve them well for months to come.

img_20200126_111010

Here is one of the cuttings, a Super Fireball Neoreglia, wonderful groundcover and hard to kill. One of my favorites. It grows almost on a runner (actually a stolon), the mother plant (on the left) dies and generally makes two or three pups like this one. The mother plant is cut off and  thrown away, I always feel bad about this. The roots are left intact and placed inside the nursery container.

Super Fireball Neoregelia in the garden, cold weather makes the red and peach coloration come out, these are closer to green in summer.

20190119_114327-1

Another  view:

img_20200126_113315

The cachepot is Portmerion, bought years ago on an antiqueing mission with my mother. The pot is a favorite of mine, but I rarely have houseplants as I have a strong tendency to kill them. The Bromeliads should last for months and root into the pot.

From above:

img_20200126_113423

These are all Neoregelia Bromeliads, grown primarily for foliage. The flowers are not very exciting. I know two of the four varieties – there are 3500 types of Bromeliads and I lost track of some or never knew the name ( i.e. bought at a garage sale for 5 bucks) The bigger chartruese plant with the red center (the center turns red with cooler weather) is a Blushing Bromeliad (Neoregelia carolinae). The Burgundy with green center and no spots is Super Fireball, the spotted ones I have not a clue the species. The grey plant in the foreground is a succulent – a Graptosedum of some kind that a friend gave to me, they enjoy the same soil conditions and I have a few in containers with Bromeliads on the porches at my house. Spanish moss is used for fill in the edges (and hide the black plastic nursery pot) is also a Bromeliad (Tillandsia usneoides)

Happy Gardening!

For more vases from around the world, visit Cathy at http://www.ramblinginthegarden.wordpress.com.

Bromeliads for South Florida Gardens

I first encountered Bromeliads as houseplants in the 1980s. Winter Gardens, Atrium and Interiorscaping were popular indoors in Shopping Malls and Office Buildings. At the time, I worked for a large Architectural firm as a Landscape Architect and designed these gardens using flowering Bromeliads as color beds in large planted areas. The Bromeliads I used primarily in these indoor plantings were Aechmea fasciata (left) and Guzmanias on the right.


Many years later, my husband and I relocated to the Treasure Coast of Florida. I was excited to learn about all the Bromeliads I could use in my garden. Houseplants rule the outdoors in South Florida. Now I have Guzmanias and Aechmea fasciatas in my garden.

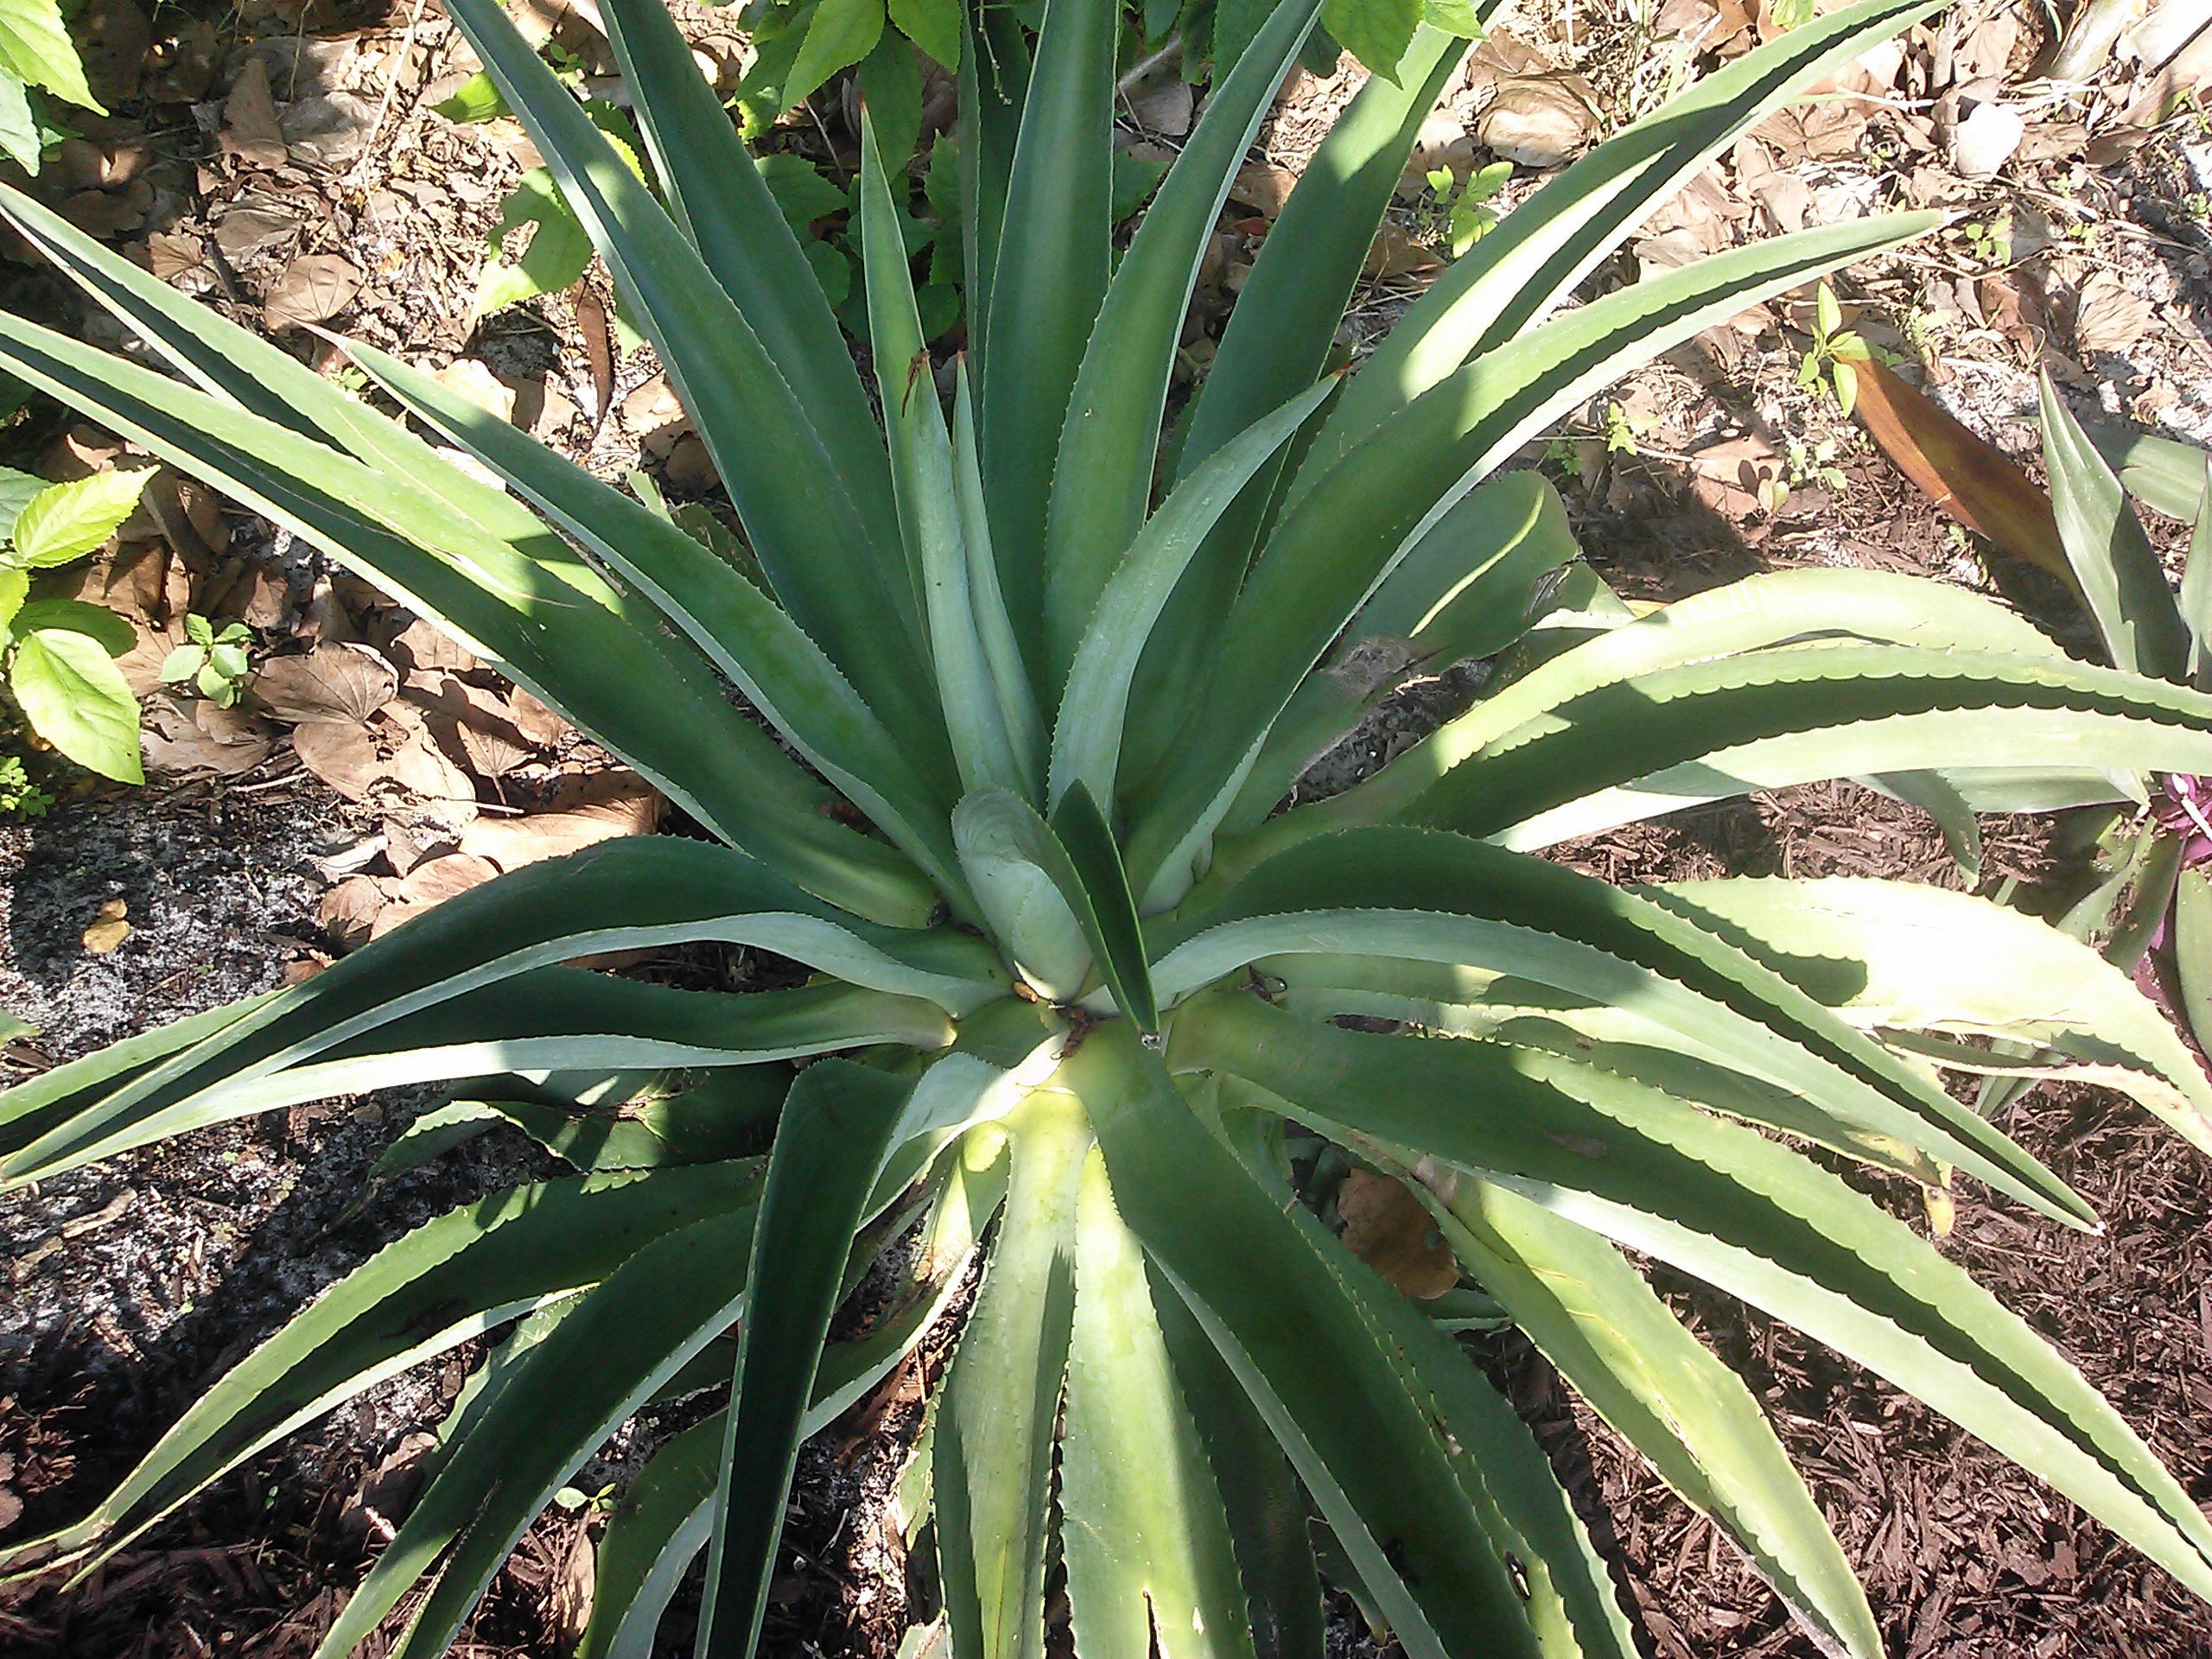
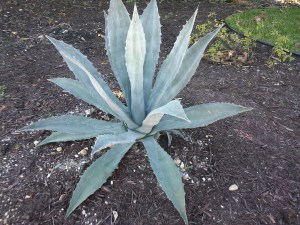
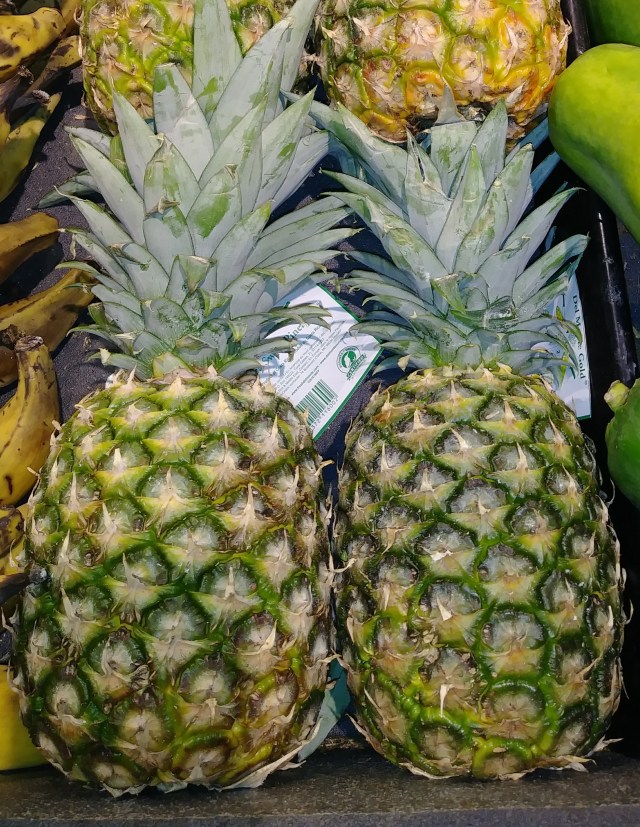
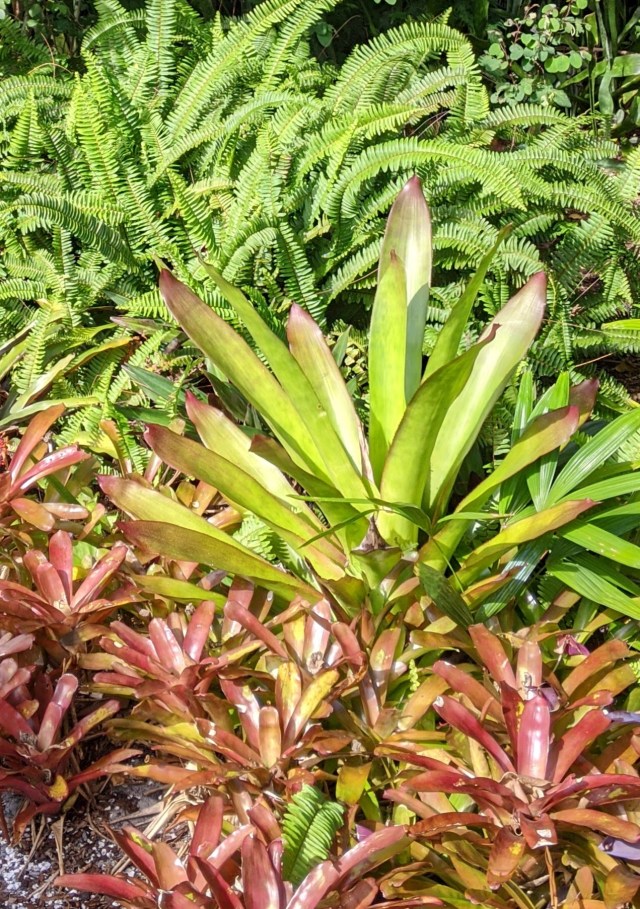
Bromeliads have a broad range of appearance. They range from highly colored foliage with flowers prized in our gardens to Spanish Moss hanging from Oak trees common in the Deep South. Bromeliads may also be found at the supermarket in the form of a Pineapple. Some are epiphytes living on trees (Spanish Moss) others are considered terrestrial and root into the ground. Bromeliads use specialized cells to collect water from the air, they also use cups to collect rainwater and derive nutrients from debris collected in the cup.

20190123_091413-1

While we have several native Bromeliads in Florida (Tillandsias for the most part), most of the showy ones we use in our gardens are from further south in the tropical Americas, many of my favorites hail from Brazil. These are easy to grow, tough plants that lend a tropical touch to our gardens. I use them as the icing in the garden, like using flowering perennials further north.

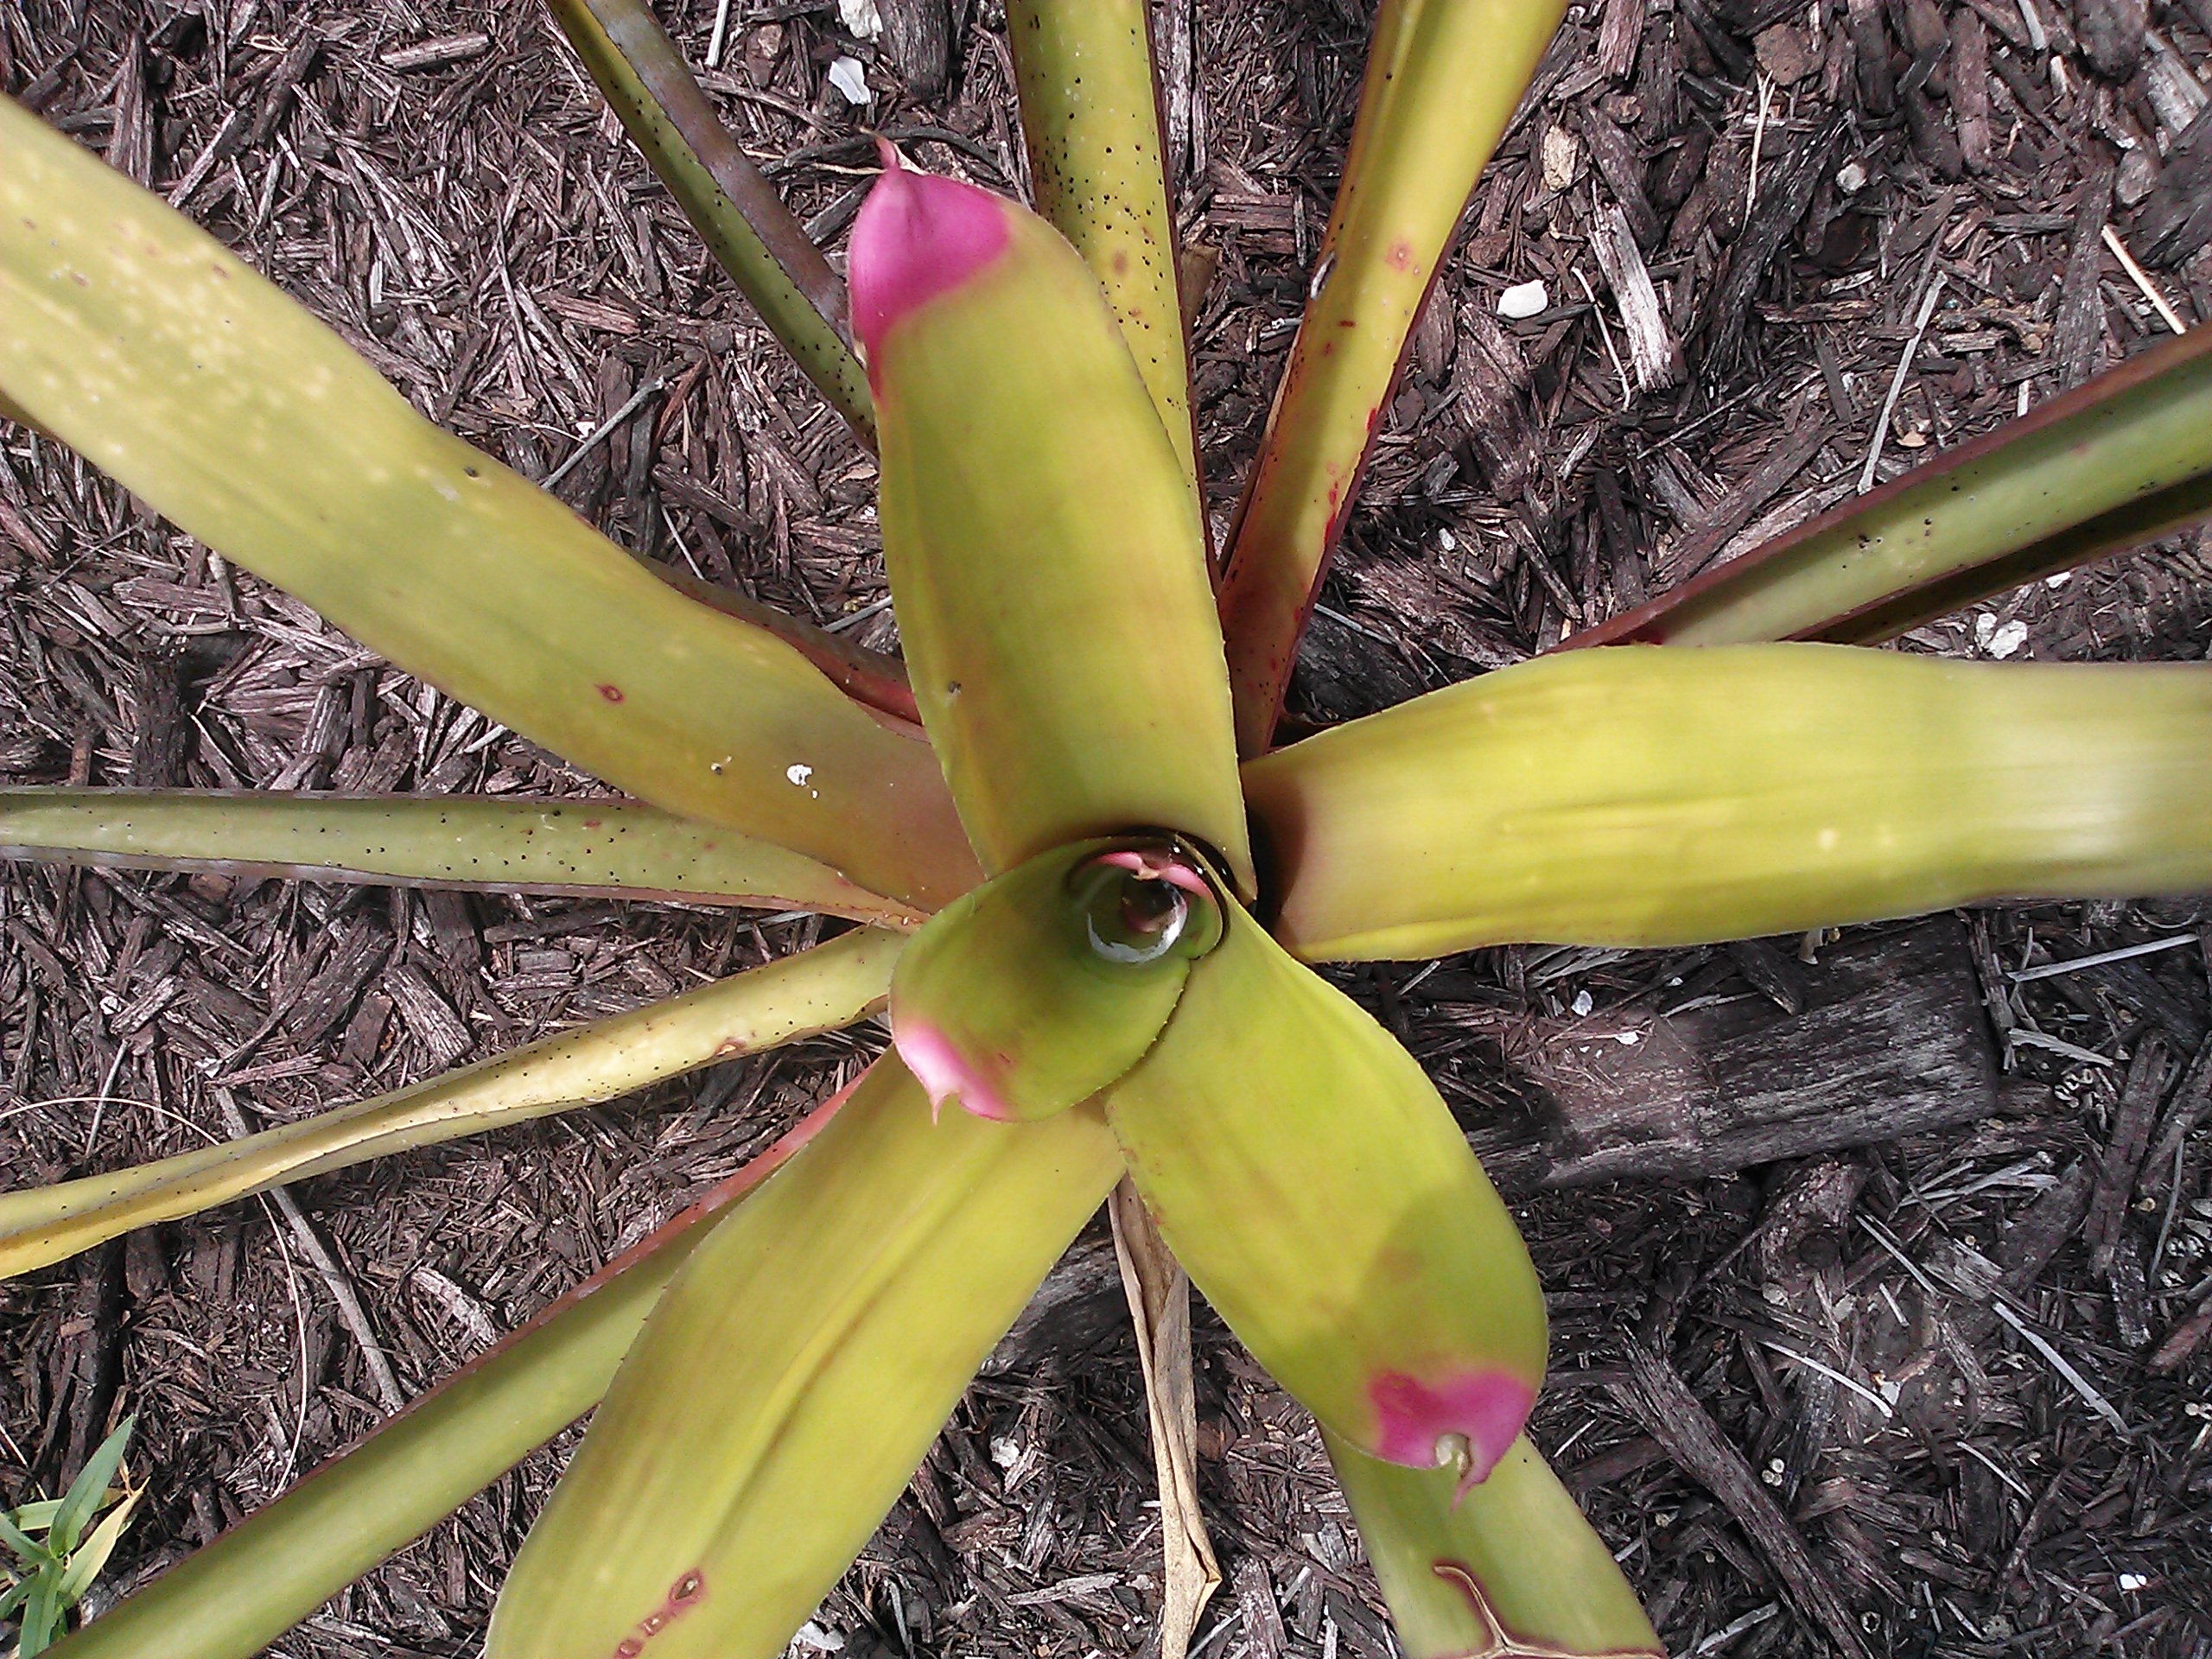
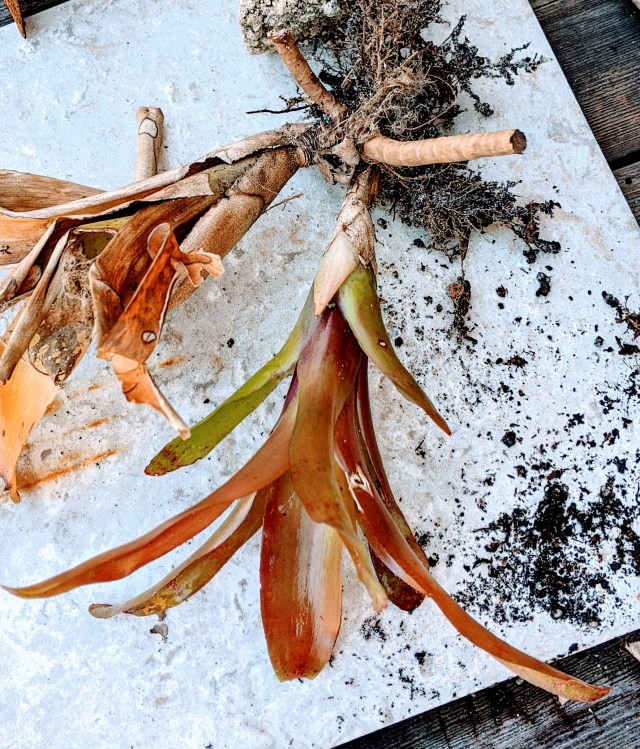
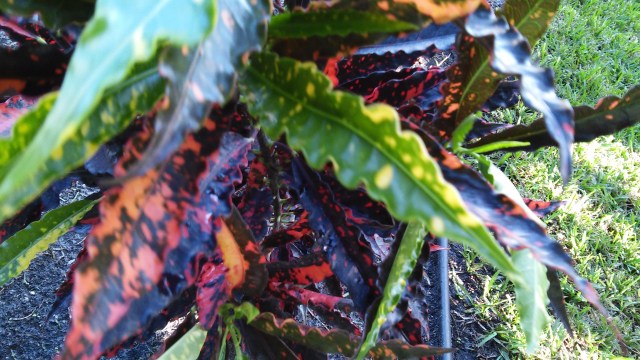
Being of different origins than most perennials, Bromeliads require a bit of understanding-the plant originally purchased eventually will flower and die. This is called the mother plant generally. The mother plant flowers then begin to decline; offshoots called pups then appear around the plant. Pups can be left in place around the mother or clipped off when they reach a third the size of the mother plant. Pups removed may be replanted and usually require staking or a rock to hold them in place until they are established. Aechmea ‘Chiantinii Surprise’ with pups.

20190119_121733-1

Chantinii Surprise

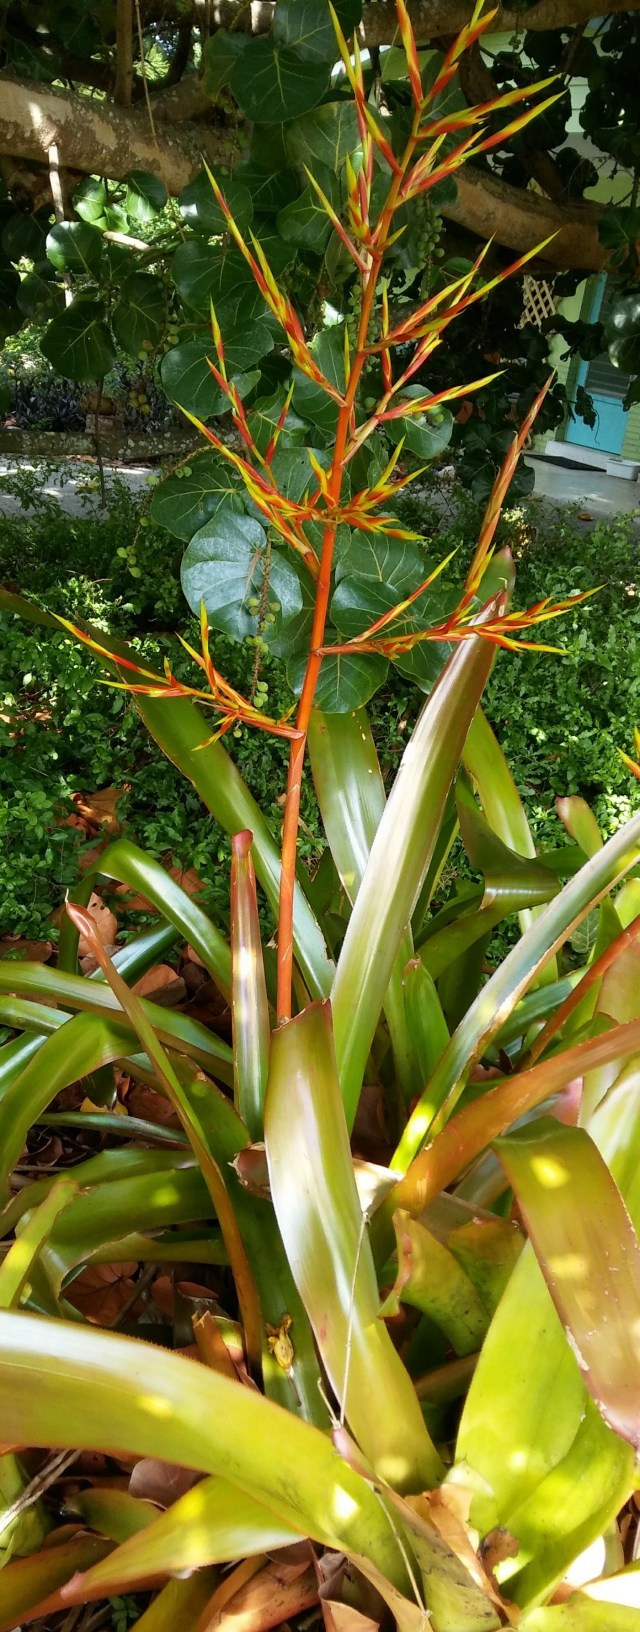
My transition from a houseplant tender to the garden Bromeliad enthusiast had a bit of a learning curve. Soon after moving to the Treasure Coast, the very common (here) Blanchetiana Bromeliad began blooming around town. Being a burgeoning fan of the garden Bromeliad, I nearly wrecked my car trying to get a look at the thing. Orange foliage, nearly as tall as I am with a red and yellow spike flower of a similar size. No longer in houseplant territory- this was some serious vegetation!

20170723_102038-1

Now I make wreaths during the holidays from the flowers:

20181220_164754-1

Seeking advice on the needs of these plants proved to be elusive and I began to just plant them. If someone said it needs “some sun” – this means it really needs partial shade. I charco-broiled more than one plant seeking the “some sun”. There are some reliable full sun plants; finding the right plant for the right spot is key.

Some favorite sun Bromeliads:


This slideshow requires JavaScript.

Some favorite shade Bromeliads:


This slideshow requires JavaScript.

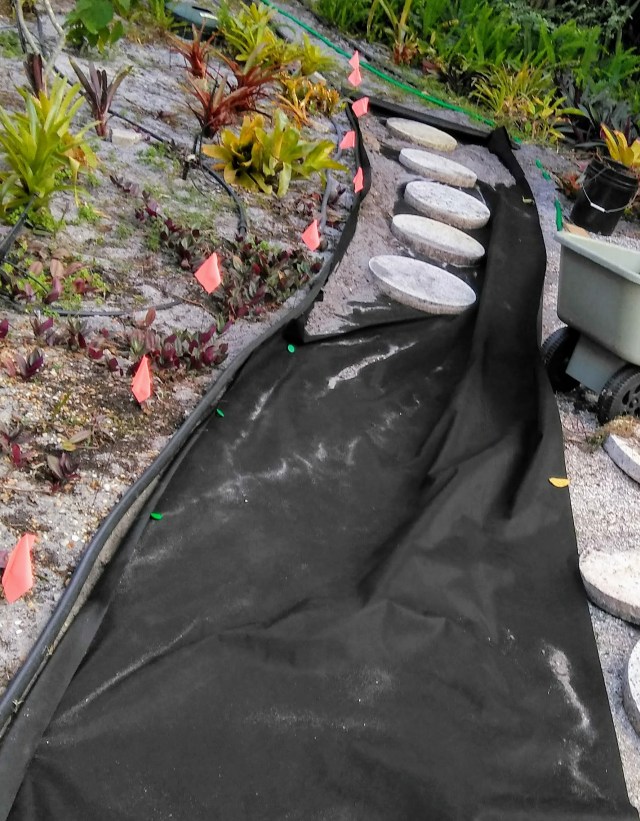
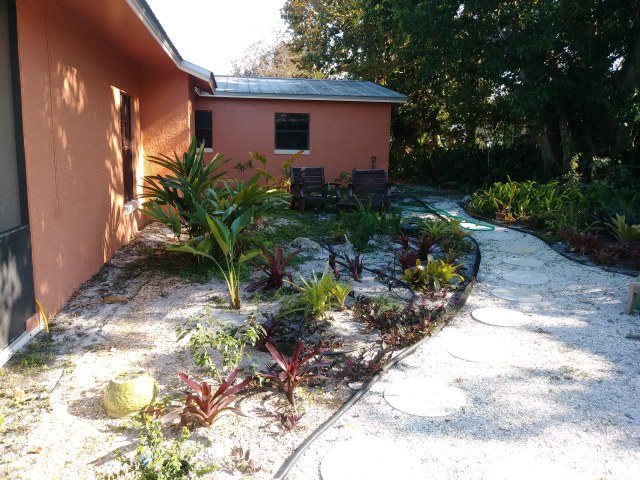
Another key to success with Bromeliads is planting them during the proper time of year. Dividing and installing new plants in your garden should be done between November and March, the reason, to allow the plants to slowly acclimate to the sun – the sun angles in South Florida are dramatically different between summer and winter. Some of the more sun tolerant ones may be planted year round. Landscape beds near a north facing wall can be the full sun in summer and full shade in winter.

Design tips:

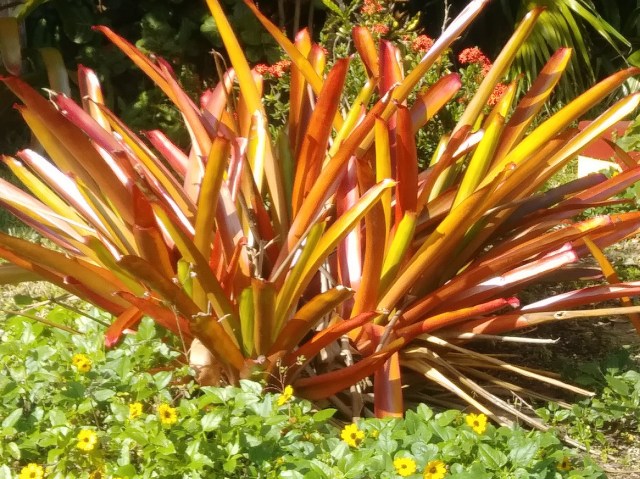
Consider the big Bromeliads exclamation points in the garden, use sparingly. Everybody can’t be the star. Even stars need a chorus. This is Aechmea Blanchetiana in a pool of Beach Sunflowers (Helianthus debilis)!

20190107_102831-1

Restrain the color palette to three colors. My favorite color schemes are:

In shade to partial shade: Colors and varieties

Red/Green/Burgundy – Neoregelia ‘Maria’, Neoregelia ‘Angel Face’


Good companion plants: Coontie Palms, Ferns

Gold/ Green/ Salmony Red: Vriesea ospinae ‘Gruberii’, Neoregelia ‘Super Fireball’


20190125_134333-1

Combination of orange, red and green for sun; named from left to right

Neoregelia ‘Fireball’, Neoregelia ‘Bossa Nova’, Bird of Paradise (not a Bromeliad), Aechmea ‘Alvarez’, Aechmea ‘Red Candles’

The Bird of Paradise is shown as a companion plant example.

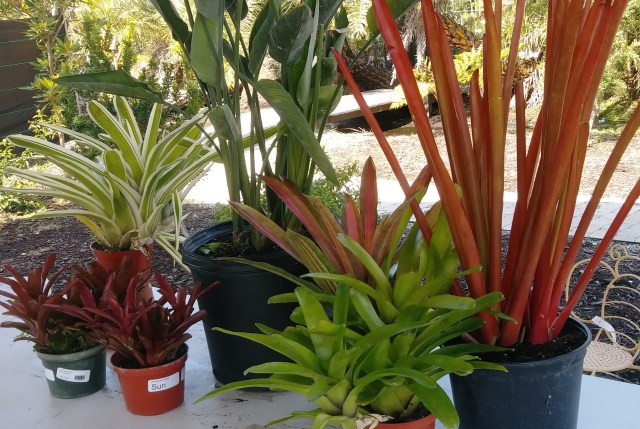
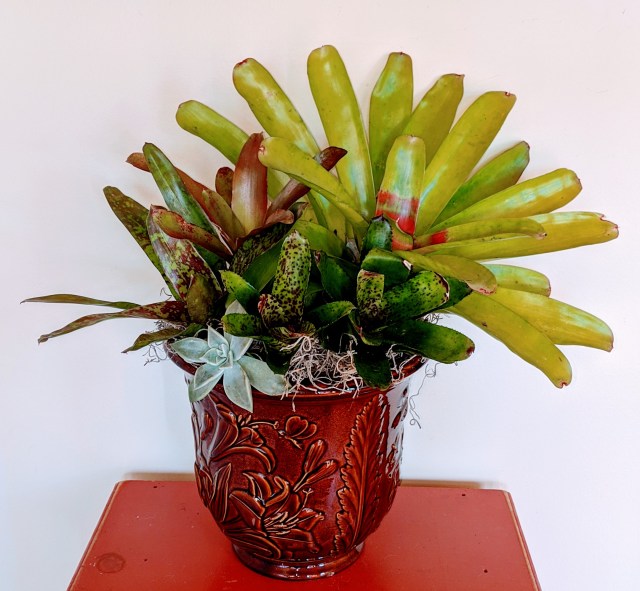
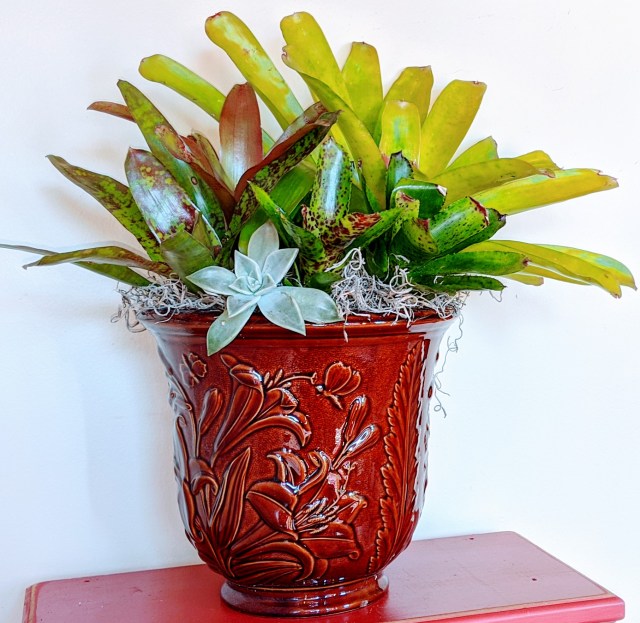
Bromeliads also make great container plants. Here are a few examples we put together at Pinders Nursery in Palm City, Florida for a talk I gave (about Bromeliads!) last Saturday. These container plantings last a long time, until the plant flowers or you need a change of view.


20190125_134251-1

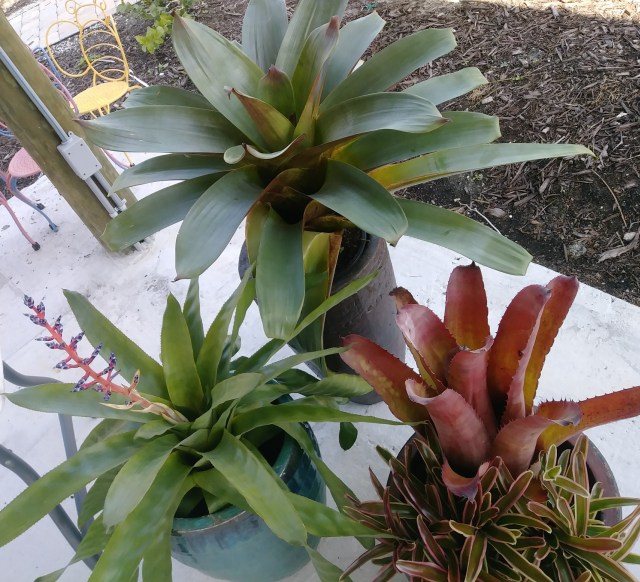
Plants are: in back ‘Imperial Red’ Alcanterea (for sun – these bloom every 10 years), in the blue container for shade, Aechmea ‘Del Mar’, the brown bowl has Aechmea ‘Bracteata Red’ and Neoregelia ‘Donger’ would take Sun.


In A Vase on Monday – Contrasting Elements.

20170108_102909

My goal this week was to use an actual vase! Check. The vase is one of my thrift store finds that I have greatly enjoyed. As I was thinking of what to use in the vase I realized my native Firebush was starting to flower after  I cut it back in December, so that started the ball rolling. Here is a better photo of the vase:

20170108_102818

I had to bundle up to wander outside today. We are having winter today, when I woke up this morning the weather said it was 47 degrees (F) and felt like 37. There is also a gale warning and the wind blowing in from the north off the Atlantic Ocean is cold in January.

The plants seem perfectly content in the breezy cool, thus far and it always surprises me what I find when it seems not much is flowering. Since I started with orange Firebush flowers I remembered a professor from design school saying you always need a color jump (jump being from one side of the color wheel to the other) in your compositions. My color jump was to the blue Pom Pom Aster. Then I added a pink one and some Tropical Red Salvia. After that the color was getting pretty jumpy so I decided some grey was needed to cool things down. The Flapjack Kalanchoes are blooming and seemed just right.

Complicating my mental dilemma was another sacrosanct axiom from design school, all elements must occur in odd numbers. Ones, threes, fives and sevens are best. Fortunately, there were three Pom Pom Asters. A friend from school told me once he thought fours were best when planting a featured perennial because the fourth plant makes your eye go round in circles and focus on the plant. Perhaps my nearsightedness prevents me from perceiving the miracle of four.

Finding myself dangerously close to a self inflicted design lecture – I cut some different foliage for contrast. Dwarf Red striped Pineapple, Muhly Grass and Copper Fennel were added, coarse and fine texture and color all at once. Breathing a sigh of relief from all this thought I decided to make lunch.

20170108_103054


In a Vase on Monday- No Pansies Here


20160417_155808

I usually start with one idea and end up with something completely different. After suffering a planting design lecture from myself, I ended up with this. The Orange (called Dwarf Red) Ixoras have started flowering in earnest, so I plucked a few of those and began to make a posy (thank you, Cathy , our meme hostess at ramblinginthegarden) for the new term I love. A posy would be called a bouquet in the US, I can’t speak for anywhere else. My posy just wasn’t working out even though the design principles were solid (more lecturing) fine textured orange contrasting with coarser yellow flowers (Beach Sunflowers) the big coarse purple Solar Sunrise Coleus leaves edged in chartreuse picking up the color of the finer textured Boston Ferns. I give myself a headache thinking about these things sometimes.

After the failure of my posy design to gel, caused primarily by structural issues due to poorly considered stem lengths, I sought a small vase for my finely considered composition. The vase was my mothers favorite pansy jar. A none too fine pressed glass jar from God knows where that was frequently filled with pansies in the winter during my childhood. Perfect for oddly too short stems. My mother, not being much of an arranger, would have loved this one. The below photo is my mother (in 1948) overlooking the pansy jar.

20160417_170833

Pansies in South Florida are an ill considered indulgence. Lasting when temperatures are perfect, maybe two weeks, and requiring more vigilance than I possess I have forsaken them for more tropical flowers. So, no pansies for the pansy jar. But a few new plant friends have been made to grace this heirloom vase.

Piecrust Croton and Friends

20151230_153823

Piecrust Croton

I have been reworking  the design of my front yard because the access point for the septic tank was in a lawn area and actually needed access. What this really means is once a year a 3 foot circle in the lawn  is dug up and destroyed to clean the (ewww, yes) septic tank filter. The joys of country living. I am certain I did not know septic tanks had filters prior to moving to Florida. I also realized I would like to have a pathway to the side.

For many years I have advised my clients to live in their houses for a while to see how they move around the property as sometimes a good guess just really doesn’t do the trick. The upshot is I did not take my own advice and I like to travel to my side garden (ah, future garden) more than I thought I would. Design that originates with how you live in a place is always a good plan. This may be Plan B as I did Plan A. Who knew St. Augustinegrass wouldn’t be happy over a septic tank. Oh, well. I am liking the new bed thus far.

A nod to my husbands pie making skills was the purchase of a Piecrust Croton, a multi colored tropical shrub that hails from the South Pacific. These shrubs are easy to grow and ubiquitous in South Florida. There are a few stalwart standby varieties that are common, but of course I love the weird stuff.

Here are the standard varieties:

At the top of the post is the foliage of the Piecrust – it looks like, you guessed it, Piecrust!  The rest, clicking on the picture will give the name. Being the plant freak that I am, I couldn’t resist photographing several more interesting varieties:

I  love all of these, but I think Stoplight might be the next Croton purchase on my Croton bucket list. How many people have a Croton bucket list?

Yes, the beds are getting bigger. The good news is I probably have a quarter acre left!!

Back to the inspiration for all of this, the piecrust. Here are a few of my husbands pies:

I think these merit a celebratory Croton in the front yard.

Speaking of celebratory, Happy New Year to all.

Chopped Gardening

One of my guilty pleasures is watching Foodtv. I have a few favorite shows that are religiously recorded for later viewing, Chopped is one. For those of you not familiar with Chopped, a group of four chefs is given a basket of sometimes bizarre food items – say, venison, gumdrops, cinnamon liqueur, broccoli rabe and rice cereal, then the goal is to make a gourmet three course meal  (using the basket ingredients) within a certain timeframe. Other ingredients may be added, but all the basket items must be used. The chef’s food is reviewed on a course by course basis until all but one is left. That chef wins and the rest are chopped.

I was standing outside contemplating where to plant the odd assemblage of plants I had acquired when I realized that my garden is a continuous episode of Chopped. My ingredients are plants. Gardening in Florida adds a few wrinkles to the design process – interesting things just tend to pop up in the garden and there are numerous irresistible plant sales. Then a friend or neighbor leaves an interesting plant on the doorstep. It’s a dilemma.

After two years of dreadful well water, we joyfully hooked up to our public water system last year. I had left a blank spot down our side property line for the purpose of running the line to our house. After the water line installation was complete the plan was to finish the side landscaping.

Life intervened and I had to have hernia surgery. Doctor said in four weeks it should heal. Sounds great, by the way it could take up to six months. It took 5 months, two weeks and then I could move things around in the garden that weighed more than 2 pounds.

The side garden is now weed o rama and I have more than the usual stockpile of odd plants to use in the landscaping:

From friends:

American Agave

American Agave

Large  Orange Blanchetiana Bromeliad

Large Orange Blanchetiana Bromeliad

Things that have just popped up in the yard: Orange Clerodendrum, Pink Pentas, Boston Fern, White Spider Lilies, Pink Rain Lilies and Purple Oyster Plants. A Plant Palette I could not have dreamed up.

How to combine all of these plants in addition to my usual collection of 5 or so Bromeliads is taxing my brain. It’s a real episode of Gardening Chopped. I hope I make it through the first round.

Proper Attire for H***strip Gardening

I learned a new term this week: Hellstrip. Hellstrip refers to the baking hot area between the street and sidewalk or driveway. A book has been published about these gardens and there is a Facebook page. Hellstrip has hit social media! Usually narrow and not easily watered these areas require some special consideration and are difficult for gardeners to conquer.

I had not realized I even had a HELLSTRIP and the truth is I kind of like it. When my husband and I bought our house there was a Jacaranda in the strip that could literally be seen through. The top of the tree had been blown out and the crotch had rotted to the point you could catch glimpses of the house through the trunk from the street. Fearing an unstructurally sound tree, I had the Jacaranda removed. What grew under the tree might kindly be referred to as sand spurs.

The sand spurs took a bit of work to get rid of as nothing really kills them except removal and they reseed heavily. Gallons of vinegar later and with the construction of a new driveway, I had a blank palette.

With a bit of research and observation I determined the plant list and began to install.

First, a native and very drought tolerant tree, The Gumbo Limbo. Gumbo Limbos are wonderful Shade Trees but pretty basic. Then to the underplantings, I searched native beach plants and looked for extremely tolerant passalongs, here is what I found:

The Sunflowers and Muhly Grass are native, the rest are imports that are very drought tolerant. Worst comes to worst, I can make some tequila from the Agave..

Dune Sunflower Helianthus debilis

Dune Sunflower
Helianthus debilis

Painted Fingernail Bromeliad

Painted Fingernail
Bromeliad

Blue Agave

Blue Agave

Martin Bromeliad

Martin Bromeliad

Muhly Grass

Muhly Grass

The composition might seem a bit weird, but I have color year round and throw some water around every now and again. All the plants are doing well, with no irrigation whatsoever and growing in the poorest excuse for soil I have ever encountered.

Now, the question, the attire for Hellstrip Gardening, I propose this:

Animal Print Bustiers

Animal Print Bustiers

Maybe worn with Combat boots? I’ve been meaning to get a tattoo, maybe of my favorite Bromeliad….


Building a Seashell Driveway

The Before Picture

The Before Picture

My husband and I bought a distressed property in South Florida. The driveway was really distressed. It took an archaeology dig to figure out where it had been and what it had been. After a bit of detective work we found a ‘Chattahoochee Stone’ pea gravel drive with a turnaround in front of the house. About 70 % overgrown with apocalypse proof weeds. The front yard became a free for all ad hoc parking area. Nobody could tell where they were supposed to park.

Part of the reason we bought this house was the garage was in the back. This is unusual in South Florida. Garage doors are usually a dominant feature of the front of the house. In some places it seems as if someone got a gigantic copier and started printing out houses with prominent garage doors. Later it dawned on me the reason for this is to provide the least amount of stormwater running off the concrete paving (the shortest possible driveway) and given the flatness of the terrain, it was also a short run to slope the driveway to provide drainage back to the street. It is also the cheapest way to get a lot of houses on a piece of property (i.e. Making the developer more money)

My husband retired and we decided to forsake the traffic and cold of the big city and moved 600 miles south from Atlanta to South Florida. The namesake of our existing driveway material, the Chattahoochee River, is a major feature in Atlanta.  The headwaters of the Chattahoochee are in the North Georgia Mountains, then it winds through Atlanta eventually pouring out into The Gulf of Mexico on the panhandle of Florida.

The driveway needed a renovation, however, it seemed a bit ridiculous, not to mention wasteful, to import pea gravel 600 miles to South Florida. Additionally, I was not enthralled with the brown pea gravel, having found it to be a fiesta of weeds in my previous garden and it cost at least 3 times what I had been paying for it in Atlanta. Based on the appearance of the existing drive it was nirvana for weeds. Not a good idea in South Florida.

The search began for new material for the driveway. The local rock here is limestone; crushed rock primarily for road construction. The rock is lumpy, starts out white and eventually looks very dirty. I didn’t like this option, but it was cheap. My next thought was pouring a concrete driveway, but, as a Very well seasoned Landscape Architect  (yes, I meant to capitalize Very for emphasis) I could tell the drainage just wasn’t going to work. In the event of rain, there would be too much water running off the driveway with nowhere to go. With the exception of the floor of our garage, not a good plan.

The driveway needed to be made of a pervious material so the rainwater could soak back into the ground rather than running off. During the course of my concrete drive design/pricing exercise I met a grading contractor who told me it was possible to build a shell driveway. What I couldn’t (and still don’t) understand was why there weren’t any of these driveways around. The only answer is they went out of style. People had been seduced by the evil brown pea gravel from the faraway Chattahoochee River.  I can only guess why. I did recall, however, over the course of my career people have waxed on romantically recalling the crunch of the pea gravel in their (perhaps very wealthy and with many yardmen) Grandmother’s yard.  This reminiscence is usually related to formal boxwood gardens in the Deep South. They never had to pull the weeds or pay for imported pea gravel.

I thought the shell was a great idea and, of course, did a bit of research. The shell used for constructing the driveway is mined about 20 miles north of my house. It is a byproduct of mining sand; five different sizes of material come out of the mine and are used for construction. The sand is used for construction and the shells are sorted out by size and intended use. My driveway is topped with ⅜” graded shell.

Shell driveways, properly constructed, last a long time. The construction method is as follows:

Grade the area and remove about 5-6’’ depth of existing soil. Compact the existing soil to receive the base material. Provide restraints around edges of driving surface to hold the loose driveway material. My driveway has pressure treated pine timber and Black PVC Landscape edging that act to hold the shell in place. I have seen drives edged with concrete curb or pavers set in mortar. This looks great and is, of course, a lot more expensive.

French drains were installed under the driving surface in areas where the water collects as it drains off the roof during a large cloudburst. Another South Florida peculiarity, no gutters, but some scuppers…you must cope with whatever comes off the roof, wherever it comes off the roof. Fortunately, I like rocks and Rain Gardens.  The drains were made from old solid walled laundry baskets with the bottoms removed then the contractor dug holes and placed them underground, filled them with gravel and topped the whole thing with filter fabric. The old gravel from the existing driveway was reused to fill the drains.

To build the driveway a 2-3” layer of crushed shell (this looks like coarse sand) is laid on top of the existing soil and pressed into place with a Bobcat. This is topped by a 2-3” layer of shell placed with a Bobcat and pressed evenly. The crushed shell course binds to itself and creates a pervious base layer. The shell course provides the driving surface. Maintenance requirements are spraying weed killer (I use the non toxic homemade vinegar solution) and raking it out every now and then. The materials firm up a great deal from cars driving on them and rain, but it is still a loose material.

I am pleased with the appearance of the shell driveway and it’s functionality. It drains perfectly and looks great. The shell also gives a great local, beachy feel to our property. And it looks really clean. It is also a very sustainable project, the majority of the materials arrived from within 50 miles of my house. The shell is a reuse product from a local mine. The driveway is pervious and most of the stormwater drains back into my property. I have two guest parking spaces and a turnaround for use when backing out of the garage. Pleasing the environment and me.

The Shell Driveway

The Shell Driveway

Fall Color in South Florida – Bolivian Sunflowers

The Sunflower Hedge

The Sunflower Hedge

I have been noticing these plants for the past few years and it always seems weird to me to associate Sunflowers with November. Gigantic Sunflower Shrubs, at that. I also assumed incorrectly they were some sort of Helianthus. Not the case, this is a Tithonia, Tithonia diversifolia – the Bolivian Sunflower. In another perversity of plant naming, the Bolivian Sunflower is native to Mexico and Central America. I am fairly certain Bolivia is in South America.The name Mexican Sunflower is already taken for a smaller perennial.

One of my neighbors has a hedge of Bolivian Sunflowers screening the yard. This Sunflower hedge is at least 12 tall and in full bloom right now. This plant grows Spring and Summer and blooms all Fall and Winter. It has just really started blooming in earnest and should continue for a couple of months. Another one of those kooky benefits of living in South Florida, Sunflowers all winter.

Since the possible 16′ tall shrub bears 6″ flowers profusely, I am imagining it can put out quite a few seeds and become a problem. I am not sure I would try a hedge, but maybe one or two to screen a view where the lawnmower will run over any nearby seedlings. One has to practice selective lawn mower placement of plants here if there is any question of overabundance. No frost means nothing ever dies. Or anything you want gone refuses to die.